Sunday, December 13, 2015

Google Cardboard Controlling Raspberry Pi Streaming Tilt-and-Pan Streaming Video

Background

In a prior post (link), I demonstrated a setup which:

  • A Raspberry Pi streams WebRTC video to anywhere on the internet.
  • Can pan horizontally using an additional WebSocket control channel, controlled by a Chrome page which works on Desktop and Mobile.

I have extended that setup so that now:

  • I can both tilt and pan (X and Y axis, using a different WebSocket for each)
  • Uses a phone's orientation data to dictate the angle each axis should rotate to.
  • Exposes a fullscreen WebRTC video which still relays the orientation data.
  • Exposes a fullscreen Google Cardboard display mode which also still relays orientation data.

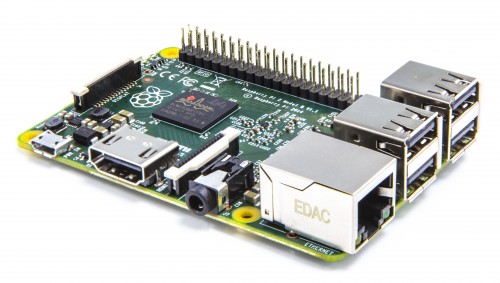
The basic network and communication setup didn't change, and and really only required an additional servo for the Y axis, as well as the incorporation of client-side javascript libraries.  The client in this case is Chrome for mobile (Android in my case).


Videos

External view:


Internal view:


Screenshots

Below I have a few pictures of the setup, some video of the setup in action, and an explanation of how I extended Client-side functionality.

My home-brew tilt-and-pan rig.  Just two servos control it, one for X, one for Y.


A close-up shot of the Y-axis servo.  Only the highest quality rubber bands and cardboard will do.


Here is a screenshot of the webpage control.  This happens to be on Desktop for screenshotting.
It's a prototyping page, and so a number of controls are exposed:

  • The top is some interactive controls to connect and disconnect my WebRTC, and the two WebSocket control channels.
  • The video below it is the WebRTC video stream applied to a <video> tag.
  • The "Camera Control" box below it lets me switch between manual servo control and Orientation Sensor mode.  Full-screen when touched.
  • The Cardboard View is another element (more on this later) which displays the split screen view required for viewing the video in Google Cardboard.  Full-screen when touched.


Here is the Cardboard View element full-screen on Chrome on my phone.  It's displaying the WebRTC video feed in a split-screen.


And that view now in my Google Cardboard viewer (ViewMaster).


And a close-up of the Google Cardboard viewer once closed up and ready to look at.


Client-side functionality

There are a few client-side enhancements that needed to be made to make this possible:

  • Reading the Orientation Sensor data
  • Creating the Cardboard view


Reading the Orientation Sensor data

I had played with the Orientation API (link)  as seen around on the web in the past, but found it confusing.  Maybe I'm just not understanding it correctly.

The reason I found it confusing is because the Orientation API is returning Euler Angles (link), which don't directly give me the data I want.  And what it does give me I found difficult to turn into what I want.

What I really want is to get some readings which are more like what a person would intuitively think of as orientation.

That is, if I'm standing up, and I rotate in-place to the right, that could be expressed as a rotation in positive degrees.  Negative if I turn left.  Let's say that's the X axis.

If I look upward, or downward, that could also be expressed in terms of positive and negative degrees.  Let's say that's the Y axis.

In both cases, I have mapped the Orientation Sensor data to X and Y axis rotations to positive and negative degrees, ranging from 90 to -90 in either direction.  Useful since that's 180 degrees total, which is basically the range of a servo.

The software running on the Pi is a very simple program which expects to be told a number in the range 90 to -90, and map that to the appropriate PWM calls to move the servo to that location.

Getting the Orientation mapping to work was a challenging task for me and involved actually having to leverage some graphics libraries (Three.js) for some conversion away from Euler Angles (which are apparently used in graphics) and subsequently do some trig.  I'm probably doing it wrong.

Creating the Cardboard view

The Google Cardboard viewer requires a split-screen display with each image aligned to the center of the lens for each eye.

To accomplish this, I additionally use Three.js and its StereoEffect plugin.

The basic application in javascript is:

  • Create a Three scene
  • Create a Three renderer (WebGL)
  • Wrap the renderer in the StereoEffect effect
  • Create a HTML canvas element
  • Create a Three texture from the canvas
  • Create a 2d plane and apply a Three Mesh to it which has the canvas-backed texture mapped onto it
  • When animating
    • Get the current video frame from the WebRTC-backed <video> tag, and paint it onto the canvas.
    • Indicate to the Three texture that the canvas data has changed.

This leads to a split-screen render where there is a 2D plane which appears to be a video playing in front of each eye.


Final Notes

There are several areas which need to be improved about the whole setup.

Latency

There is a bit of delay (sub-second) in movement of the Cardboard viewer and the actual perceived movement of the image in the video.

This is going to be a combination of several factors, such as:

  • Pure network latency.  I'm in NJ, the Pi is in NJ, and I communicate to it via Montreal when using the Internet (as opposed to LAN-only).  That's a one-way 720 mile journey.
    • On the other hand, even on the LAN the latency isn't much better.
  • Latency on the Python program running on the Pi of actually processing messages and moving the servo.
  • Latency of the video streaming software (UV4L) pushing out new frames and subsequently being received and displayed on the browser.
I will investigate this in a future post.  Latency is not a concern in this prototype but it'd be nice to see where it's all coming from.


The actual tilt-and-pan rig

It's pretty make-shift at the moment.  A co-worker pointed me at a properly-built tilt-and-pan rig for less than $9 on Deal Extreme (link).  I put in an order and will wait to see how it works.

Not a huge priority actually but probably more stable.  Plus the rig comes with two servos so not bad.


Friday, December 11, 2015

VPS, NGINX, SSL, and Unlimited Sub-Domains

Premise

In setting up a number of projects I have found having a server running on the public internet to be very useful.

In the past, this had been possible using Dynamic DNS and punching a hole in my home NAT.  This has worked pretty well, but there are sometimes issues with DNS or my home internet that has caused unwanted instability.

As a result, I had looked around for a cheap and reliable internet host where I could run my projects.  It turns out this is called a VPS (Virtual Private Server), and they're great.

Below I go over how I've made use of that host more efficiently than I had planned to, and how surprisingly simple it is.

Big Idea

I wanted to write some software, have it live on the public internet, open arbitrary ports, and host whatever content suitable.

A VPS basically gives you full control over a Linux (or other) install.

Features I cared the most about:

  • Static IP address
  • Full root access to a Linux (or other) host
  • Fully open ports
  • Install and run any software you like
  • Effectively unlimited data transfer

The VPS I found satisfies my requirements.

Problems

Once set up, I ran some software on the standard HTTP port 80.  I later found I had other unrelated software I wanted to run, but also have run on port 80.  This wasn't immediately possible.

Further problematic, the software needed to run on 80 and 443 for HTTPS (SSL), for both sets of software.

Ideally these would also live on different sub-domains for ease of management.

I didn't want to purchase another VPS, but wasn't sure how to overcome the fact that there was a single IP address and Port that I wanted to make use of.


Solution

NGINX is the solution.  It is a HTTP load balancer and Webserver.

I have no need for a Webserver per-se, but I did want to make use of its ability to support Virtual Servers.

Virtual Servers in the NGINX context means that if a connection comes in on, say, port 80, and the browser wants to visit dom1.example.com, NGINX can route that request to an arbitrary alternate host/port than, say, dom2.example.com.

In short, I can:

  • Set up a VPS
  • Install NGINX and run on port 80
    • Configure NGINX to know about two sub-domains (dom1 and dom2)
      • dom1 gets routed to localhost:1080
      • dom2 gets routed to localhost:2080
  • Run my own software
    • Software #1 listens on port 1080
    • Software #2 listens on port 2080

It is also the case that NGINX can re-direct to different servers depending on the URL requested, but I have no interest in that, so I didn't play with it much, but looks pretty straightforward.

I'll lastly say that the NGINX configuration is extremely simple and intuitive.  This is in contrast to what I consider to be a confusing and ugly Apache setup, for example.

Sub-Domains

I can further differentiate the software by associating a sub-domain with each piece of software (the dom1 and dom2 example above).

To easily do this, I purchased a Domain from Google Domains.  Google Domains incidentally has an excellent and simple interface.

Basically you can set as many sub-domains as you want, and point them all toward the Static IP address of the VPS.

Since all requests hit port 80, they're really hitting NGINX.  NGINX just forwards them along to the software running on that system on the configured ports.

SSL

As noted above, I also have a requirement to support SSL, in part due to Chrome's new requirement that a number of javascript APIs can only be served up via SSL (see old post here).

To do that, I set up an account with StartSSL and got some free certificates for each of my subdomains.

The NGINX configuration easily supports SSL key and cert files, and can forward traffic along once connected.

Even more beneficially, you can run software that doesn't speak SSL, as NGINX is more than happy to forward inbound SSL traffic to a non-SSL port on the other side.

See a prior post for overcoming some issues on StartSSL certs on mobile (link).


Diagram

This diagram does not nearly capture the full detail of what I described above, but hopefully somewhat useful.


Final Notes

The setup above leads to effectively unlimited sub-domains, and instances of software running on web-facing HTTP port 80.

You may note that the exact same configuration could be achieved at home behind a Dynamic DNS entry, which is true, but I value the reliability and presence on the internet more than the cost of the hosting.

The VPS I use costs around $5 per-month, and in addition to what I described above, allocates a single CPU core and 1G of RAM.

For my purposes, this is more than sufficient.


Links

VPS - Provided by OVH (link)
Domains - Provided by Google Domains (link)
NGINX - Provided by NGINX (nginx.org, nginx.com)
SSL - Provided by StartSSL (link)


Thursday, December 10, 2015

Chrome, SSL, and "Powerful Features"

I have had to deal with a new Google Chrome policy where they are now deprecating non-SSL use of a number of very useful features which they are calling "Powerful Features."

Source:  https://sites.google.com/a/chromium.org/dev/Home/chromium-security/deprecating-powerful-features-on-insecure-origins

 
We want to start by requiring secure origins for these existing features:
- Device motion / orientation
- EME
- Fullscreen
- Geolocation
- getUserMedia()


I have built demos in the past which use these features which will now break.  Also frustrating is that no console errors are thrown, nor exceptions.  The APIs I've used just stopped working with no explanation.

For my next project, having the Orientation sensor blocked for non-SSL is actually frustrating, and requires that I generate SSL keys for home and my internet deployment.

I think moving to SSL-only for these features is premature for the state of SSL availability (expensive, complex).  Overcoming these was actually a lot of work.

I eventually overcame issues with the SSL Certs working improperly, but still limited to only being freely available from a somewhat undesirable source (StartSSL).

For now, my setup is:

  • Home -- Generate my own keys/certs using openssl, and just deal with the Red padlock on chrome.
  • Internet -- Get signed certs from StartSSL


A few notes on how to overcome SSL issues with StartSSL can be seen in a prior post (link).


Wednesday, December 9, 2015

StartSSL and Fixed Red Android Chrome Padlock Issue (Cert Chain Problem)

StartSSL Certs get Green Padlock on Desktop Chrome but Red Padlock on Android Chrome?


If you see the image on the left, you may be able to turn it green.

BeforeAfter


Explanation and Fix

It seems to be that there is a Certificate Chain link that is not present in the Certificate which StartSSL gives you.  Very not obvious.

The site explains how to fix your certificate by creating a new certificate which incorporates the missing link in the chain.

Their instructions seem oriented for nginx webservers, but really it's not specific at all, just follow the instructions.

Instructions for fixup here:  https://www.startssl.com/?app=42


Start-to-Finish Instructions to create SSL Cert

Here are the notes I've taken for myself about a start-to-finish creation of a SSL cert using StartSSL.  Obviously I've glazed over the detail of using their site.

 
Step 1) SSH Key Gen (do this yourself)
--------------------------------------

> openssl genrsa -des3 -out server.key 2048
> openssl req -new -key server.key -out server.csr
> cp server.key server.key.org
> openssl rsa -in server.key.org -out server.key


Step 2) Start SSL (use their site)
----------------------------------

Go through loads of confusing steps which ultimately lead to you getting a server.crt after giving them the contents of your server.csr (signing request).


At this point you have server.crt and server.key.
These together are sufficient for:
- SSL to work on both Desktop and Android
- Green padlock on Desktop
- Red padlock on Android


The next step changes the Android Red padlock Green.


Step 3) Create actual final cert with full Certificate Chain
------------------------------------------------------------

https://www.startssl.com/?app=42 has instructions, summarized here.  Make sure you read the site and know you need the exact file I mention below, not everyone will.

In short, download the intermediate cert from their site, combine it with the server.crt into a single file which would be used exactly the same way as server.crt (but now works on Android).

Specifically:

> wget http://www.startssl.com/certs/sub.class1.server.ca.pem
> cat server.crt sub.class1.server.ca.pem > unified.crt

So the cert to use is unified.crt and the key is server.key.


Resources

I was led to solution from here: http://stackoverflow.com/questions/13862908/ssl-certificate-is-not-trusted-on-mobile-only

Analysis confirms chain issue: https://www.ssllabs.com/ssltest/analyze.html

This image is what I saw with the above analysis site, confirming the missing chain data in my cert, which turned out to the problem.


Friday, December 4, 2015

Pi Internet-controlled Rotating and Streaming Video Prototype!

After lots of work, the prototype has been successfully operated in all desired configurations.

This post is a wrap-up of all that went into completing this milestone.

Premise

I wanted to see if I could make a remote control movable real-time video streamer out of the Pi, a Webcam, and a Servo.

Bonus points added if it works over the Internet with no onerous setup.
Bonus points added if I don't have to program anything to do with video encode/decode/transcode.

The gist of how I wanted to do it:
  • Get a Raspberry Pi
  • Put a Webcam on top of a Servo
  • Have the Pi operate the Webcam (USB)
  • Have the Pi operate the Servo (GPIO)
  • Run some Pi software which can read from the Webcam and stream via WebRTC
  • Write some Pi software to operate the Servo
  • Write some software to expose both the WebRTC and Servo control exposed on the internet
  • Write some software to make use of the two interfaces and combine them into a single interface

Defined so broadly, it's hard to see how this wouldn't work.  Challenges came from the details at each stage.

I will cover each point below in varying degrees of detail.


Get a Raspberry Pi

I went with a Raspberry Pi 2.  This turned out to be a good choice since the software for WebRTC only works for Raspberry Pi 2.

Also got a WiFi dongle.


Put a Webcam on top of a Servo

Ha, just use some twist-ties and rubber bands.


Have the Pi operate the Webcam (USB)

The statement is vague, but the basic meaning is to let the Linux distro support the details of interaction with the USB Webcam.

USB isn't a prerequisite per-se, but it's common and what I had on hand.

I happened to be using a Logitech QuickCam Pro 9000, which worked well for this purpose.

I'm not super familiar with Linux Kernel support for video devices, but I've come to understand there is a class of video devices which adhere to the UVC standard, which stands for "USB Video Class."


Anyway, plug that into the Pi and you'll see that it's recognized straight away.  Here is the /var/log/messages entry.

Dec  3 19:12:49 raspberrypi kernel: [348152.387472] usb 1-1.4: new high-speed USB device number 5 using dwc_otg
Dec  3 19:12:49 raspberrypi kernel: [348152.614881] usb 1-1.4: New USB device found, idVendor=046d, idProduct=0990
Dec  3 19:12:49 raspberrypi kernel: [348152.614907] usb 1-1.4: New USB device strings: Mfr=0, Product=0, SerialNumber=2
Dec  3 19:12:49 raspberrypi kernel: [348152.614925] usb 1-1.4: SerialNumber: 4BA96858
Dec  3 19:12:49 raspberrypi kernel: [348152.853207] media: Linux media interface: v0.10
Dec  3 19:12:49 raspberrypi kernel: [348152.881669] Linux video capture interface: v2.00
Dec  3 19:12:50 raspberrypi kernel: [348153.320477] usb 1-1.4: Warning! Unlikely big volume range (=3072), cval->res is probably wrong.
Dec  3 19:12:50 raspberrypi kernel: [348153.320512] usb 1-1.4: [5] FU [Mic Capture Volume] ch = 1, val = 4608/7680/1
Dec  3 19:12:50 raspberrypi kernel: [348153.321508] usbcore: registered new interface driver snd-usb-audio
Dec  3 19:12:50 raspberrypi kernel: [348153.327973] usbcore: registered new interface driver uvcvideo
Dec  3 19:12:50 raspberrypi kernel: [348153.328001] USB Video Class driver (1.1.1)

I hadn't known at the time, but my webcam shows up on the list of UVC supported devices which can be found here:  http://www.ideasonboard.org/uvc/


Have the Pi operate the Servo (GPIO)

There is so much written about how to make a servo move online it's not useful to re-write it here.

I did make a post about some issues I ran into early on since I'm an amateur regarding this kind of thing.  Post here: (link).

Basically, watch out for power and feedback issues.

Run some Pi software which can read from the Webcam and stream via WebRTC

This was actually one of the first things I researched when starting on this project.  I posted some thoughts on it at the time here (link).

All told, UV4L (Userspace Video 4 Linux) is what I went with, and some early successes in my work on this demonstrated it had a high likelihood of working in all desired configurations.

I cared a lot about this part since working with video is likely very difficult, and definitely something I don't know how to do.  Nor do I want to do it.

Most of the majorly-difficult issues are solved if there is something can do this task.

Specifically, UV4L solves the difficulties in:

  • Reading video from the webcam and doing anything whatsoever with it.
  • Encoding the video stream to something appropriate for the end-consumer.
  • NAT traversal.
  • Transmitting video while adapting to congestion, latency, buffering, etc.

The first point is the specific implementation relating to UV4L, which does support the UVC driver for webcams, thankfully.

The last three points are attributes of whatever can 'do' WebRTC, which UV4L can.


Notably, the UV4L process supports Signaling via websockets and JSON-formatted message passing.

However, due to the purposefully-undefined Signaling requirement for setting up WebRTC, I was forced to sniff out the specific message structures defined by UV4L.

In short, I hid the details of UV4L behind a translating proxy I wrote such that I could replace UV4L for something else if I want to later.  And other reasons related to the RDVP Server which I talk about later.

Also I wasn't 100% happy with the interface presented by UV4L anyway so bye bye to that also.


You can find lots of details about UV4L starting with the announcement about WebRTC support on their site (link).

Note that their site says only Raspberry Pi 2 is supported for now.  Perhaps this will change.


Write some Pi software to operate the Servo

I basically wrote a piece of software which accepts commands to move a servo.  And then it does it.

The software has no idea there is a webcam strapped to the top of the servo.

I had a post about this here: (link)


Write some software to expose both the WebRTC and Servo control exposed on the internet

From a prior post (link) I noted the high-level architecture of the overall setup I was aiming for.

It mostly discussed the function of what I called the Rendez-vous Point (RDVP) Server.

The RDVP Server is a central place where different services and clients can register themselves for the purpose of having a connection set up between them.

This satisfies most of the "control from the internet" requirement.  Since both the controller and controlee will "connect out" to a place on the internet, NAT issues are basically eliminated.

In the diagram below:
  • The left-hand-side is the Raspberry Pi.
  • The upper-right-hand-side is the RDVP Server, which needs to be anywhere accessible to both the Pi and the Controller.  If you want internet control, it had better be on the internet.
  • The lower-right-hand-side is the Client (controller).  It's a Browser in this diagram, but could be anything really.

The "translating proxy" I discussed in the UV4L section is labeled as the WSBridge, which also acts as a male-to-male proxy.

Meaning I can ensure it reaches out to the RDVP server to make itself known.  Once connected, it can relay messages back to UV4L for the purposes of setting up a WebRTC session.


Write some software to make use of the two interfaces and combine them into a single interface

As noted in a prior post (link), I chose WebSockets as the mechanism for communication between server-side processes.

I did this with the forethought that I'd ultimately have a Browser involved in the action, and browsers speak WebSockets well, so why not be uniform.

A security dimension of WebSockets on Browsers is that at the time of writing, Browsers only want to open WebSockets to the host which served up the page you're on.

So, that means the RDVP Server needs to also serve up a web site which contains the code to connect back to the RDVP Server to control the Servo and UV4L.

Not so hard.  In fact, the WebSockets library I used was Tornado for Python, which has lots of code already written for serving up webpages.

So, I wrote some simple HTML/Javascript to serve up from my RDVP server, changed the Server to serve it up, and pointed a Browser at it.


The moment of success

Pressing the 'connect' button leads to javascript connecting two WebSockets to the RDVP server.

Speaking RDVP language, they asked their messages to be relayed to the endpoints on the Pi servicing the UV4L and Servo controllers.

From there, the webpage sets up a WebRTC session with nearly no interaction from the user other than to accept that the camera is about to be used.  Once the remote video stream is acquired, it is dropped into a video tag on the page and the rest is handled by the Browser.

Additionally, the buttons 0, 10, 20, ..., 100 become active.  Click them, and a message is sent to the Servo controller indicating that it should move to that percent of its range-of-motion.

This is a screenshot from the laptop I was working at.


A few notes on network conditions relating to WebRTC and NATs

Key in getting video to stream properly is NAT traversal.  So I wanted to be sure that wherever the Pi was, I'd be able to run the Browser somewhere else.

The NAT traversal is handled by WebRTC libs I never have to touch, but can configure.  I instruct those libs to use the google STUN servers to identify both endpoints' locations for WebRTC handshaking.

TURN (TCP relaying of traffic) is never used.  It is always peer-to-peer by constraint.

With that said, I note that the moment-of-success was:
  • Run a RDVP Server on the Internet
  • Run the Pi in my apt on the LAN WiFi
  • Run my laptop tethered against my cell phone (so outside the network of both other systems)
  • Created a peer-to-peer (non TURN) WebRTC connection between the Pi and my external laptop.

I wanted to try several configurations for where the Pi and Browser were in relation to one another's networks.

Always keeping the RDVP Server on the internet, I have subsequently placed the Pi and Browser:
  • On the same LAN (in my apt)
  • Apt LAN and Internet (Browser tethered to cell phone, maybe no NATing going on)
  • Apt LAN to different LAN over the internet (so two computers in different LANs having to do NAT traversal)

Issues:

  • Framerate is slow.  I think it may be a combination of:
    • Congested 2.4GHz WiFi.
    • UV4L CPU utilization.
    • No attempt yet made to configure the Webcam to operate differently.
  • The servo jerks around a lot, I think due to the GPIO pins being software-based, and the PWM not hitting its timing targets.  Seems much worse than normal, I think it's being affected by UV4L.
    • I'd like to solve this with RPIO, but that's not supported for Raspberry Pi 2 (yet).  Perhaps another lib will work for the time being.
  • The webcam on top of the servo is not particularly stable and keeps tipping over!

Thursday, December 3, 2015

WebRTC Prototype Works!

It works!

Tested successfully on:

  • The local LAN between two browsers on the same laptop
  • The local LAN between phone and laptop
  • The internet, phone on cell data, laptop on LAN


The RDVP Server acted as middleman and all worked as hoped.

Only STUN servers were used (the google ones).  No TURN.  Therefore direct peer-to-peer transfer while busting through the LAN NAT.

A special testing webpage was created (served up by the RDVP Server) which allowed step-by-step negotiation.

The step-by-step page was necessary just to work out how the WebRTC handshaking actually worked, since a number of examples found online were difficult to follow.

Video quality was good.  I requested and sent both audio and video streams, however I muted the audio on both ends (in the video tag) so I wouldn't hear any feedback, etc.  Something to test more in the future.

The video stream selected from the laptop defaulted to the primary lid camera, not the USB camera I also have plugged in.  For the phone, it defaulted to the front-facing camera.  Also something to test more in the future.

The webpage is far from a finished product.  It will, however, stay in existence to test out additional features of WebRTC and as a testbed while more featureful libraries are built.

Here are some screenshots.

This is a screenshot of the phone, front facing the screen.  The left side is what my front-facing camera saw, which is my second laptop screen displaying the laptop-side webpage.  The right is what my laptop camera saw (which is me aiming the front of my phone at my screen).


This is also a screenshot of the phone.  This time taking a self-portrait with my laptop in the background.


Lastly, here is a screen grab of the chrome webrtc-internals page for the session, on the laptop, keeping stats about received data.  I think this one was for an audio track of the stream, given the low bandwidth (and audioOutputLevel stat).


Overall, several megabits of data were being sent out by the laptop to the phone.

The frame rate received on the phone from the laptop wasn't as good as the frame rate in the other direction.

Next up, now that I understand WebRTC handshaking a bit better, time to sniff out the message-passing format that UV4L uses, and set up a connection.

Monday, November 30, 2015

Network Control Architecture

The first prototype of the Rendez-vous Point (RDVP) Server and Client was completed today.

This is a network communication scheme that aims to answer some of the basic questions that come up about communication between different devices.  Namely how do they find one another and communicate?

Objectives include:

  • Minimal or no configuration
  • Maximize discovery of services and capabilities
  • Common protocol
  • Easily extensible
  • Interface available to wide variety of devices
  • Agnostic as to whether operating on local network or internet

Some of the first uses intended include:
  • Discovery mechanism for purposes of WebRTC
  • Signalling mechanism for purposes of WebRTC
  • Remote control of Pi locally or over internet

The basic principles are:
  • There is a centralized server (the RDVP Server)
    • Everything connects to it
    • Password protected
    • Primary functions include:
      • Act as a transparent bridge between clients who want to communicate directly.
      • Allow Admin control
      • Present web interface
      • Enforce tightly-defined roles
  • Three tightly-defined roles for systems connecting in:
    • Admin Client
      • Speaks RDVP protocol (JSON over WebSockets)
      • Can monitor and control activities and state of Server
      • Likely spawned from web interface, but also possibly from other system such as those implemented in Python in the first prototype client.
    • Server Client
      • States ID and waits for messages to be sent to it, which it will respond to as-appropriate.
      • No messages will be sent to the Server Client unless a Client Client indicates a desire to connect to it, and the RDVP Server bridges them.
    • Client Client
      • States ID and intended Server Client to connect to.
      • Connection to Server Client will immediately be bridged or this client will be rejected and closed.

The expected use of the above is:
  • Server Clients might be anything "dumb" (like a Pi program) which is waiting to be controlled but doesn't know by who.  Simply announce itself and wait.  This also makes internet communication and control possible since the RDVP Server can easily live on the internet.
  • Client Clients are expected to be initiated from more knowledgeable control mechanisms.  This might be from a web interface, or other purpose-built mechanism.
  • Admin Clients are meant for systems which want to discover Server Clients to connect to, or otherwise observe state.
Having a central server which brokers communication also allows for snooping of communication as well as control over systems connecting in.

Future projects should be able to make use of this scheme as well.


A very specific first-use-case will be attempting to initiate WebRTC with the UV4L server.

This UV4L server is a bit opaque but does have a webserver which also responds to WebSocket connections leading to a WebRTC connection.

I don't want the webpage, I just want it to give up its video stream.  In the diagram which follows, there is a bridge between the UV4L server and the RDVP server.  This is essentially a male-to-male connection which itself is a bridge, making connection to the UV4L server possible remotely.


Here is a rough architecture diagram:


Pi SSH Disconnects and Power Management

Solved an ongoing issue with the Pi, and that is I often come back to my computer with all of my SSH terminals disconnected.

I would log back in again, and check that the uptime was still days whereas I had been away for much less than that.  So I concluded the Pi hadn't rebooted, thereby disconnecting the terminals.

It always seemed to be after a somewhat lengthy time away, but sometimes not all that long (like a few hours).

I thought first it was possibly idle connections being cut.  I played around with some settings but it didn't really do much.


After some reading online, I decided to try looking into power management on the WiFi adapter.  This was the solution.  The stackexchange discussion which led me to the solution is here (link).

The adapter I use is the recommended adapter noted in a prior post (link).

The commands required are seen below.

$ iwconfig
wlan0     IEEE 802.11bgn  ESSID:"DV_2.4Ghz"
          Mode:Managed  Frequency:2.412 GHz  Access Point: 00:81:D8:D5:46:3C
          Bit Rate=5.5 Mb/s   Tx-Power=1496 dBm
          Retry short limit:7   RTS thr:off   Fragment thr:off
          Power Management:on
          Link Quality=70/70  Signal level=-34 dBm
          Rx invalid nwid:0  Rx invalid crypt:0  Rx invalid frag:0
          Tx excessive retries:0  Invalid misc:0   Missed beacon:0

$ sudo iwconfig wlan0 power off

$ iwconfig
wlan0     IEEE 802.11bgn  ESSID:"DV_2.4Ghz"
          Mode:Managed  Frequency:2.412 GHz  Access Point: 00:81:D8:D5:46:3C
          Bit Rate=5.5 Mb/s   Tx-Power=1496 dBm
          Retry short limit:7   RTS thr:off   Fragment thr:off
          Power Management:off
          Link Quality=70/70  Signal level=-33 dBm
          Rx invalid nwid:0  Rx invalid crypt:0  Rx invalid frag:0
          Tx excessive retries:0  Invalid misc:0   Missed beacon:0


After having run this command, the issue has not come up again.

A persistent on-boot configuration will likely be required.  I doubt this command stays in effect across reboots.


Monday, November 23, 2015

Network Servo Control Demo

Now that my WebSockets libraries are working better, I decided to try to use them in a program which can control a Servo.

To make the demo more interesting, I strapped a webcam to the top of the servo so I could use it like a DIY security cam.


The servo controlling software opens a WebSocket port to listen for incoming messages.  For now, the messages are simple -- A number, which represents the percent of range of motion of the servo.

So if you send 50, that means 50% of the range of motion, and the program will instruct the servo to move there.

To send messages to the servo controller, I use a super simple program written to bridge stdio to WebSocket connection, basically a WebSocket 'telnet'.  This is my wsEndpoint program.

Feeding into the wsEndpoint is stdio, but now controlled by a 'tk' gui program showing the numbers 1-100.  Click the number, it prints the number to stdout, which is relayed over the WebSocket connection, and the servo moves.

In the screenshot above you can see a washed-out square image on the screen, that is the grid of numbers.

The webcam in this demo is hooked up to my laptop, not the Pi.  No WebRTC involved here.

Sunday, November 22, 2015

Network Control of the Pi (WebSockets) 2

Some success with WebSockets, finally.

I shied away from using asyncio support for WebSockets for several reasons:

  • I don't know much Python programming and don't understand the examples
  • It seems to be a much lower-level implementation than I want (maybe mistaken)
  • I don't want to require Python 3.4, which is required for asyncio.  I want to be able to use Python 2.7 in the event that I get some less-capable or less-modern devices involved.
I tried several libraries, and in the end had difficulty getting them to work properly on Pi.

In the end I fell back to use Tornado libraries, which is among many things, lets you implement and use:
  • An event manager
  • WebServer libs
  • WebSocket client libs

With these I've been able to build a basic set of libraries which allow me to write very short Python programs which can:
  • Listen on arbitrary WebSocket addresses (eg ws://127.0.01:4000/).
  • Connect to any arbitrary WebSocket adddress.
  • Handle console input while doing any of the above.
  • Do all of the above via an Event Loop, no blocking required.

Difficulties came up understanding how various events fire in association with WebSocket connections working, etc, and how that fit into the interface I wanted to build.

An example being - What if your program tries to connect outbound (async) and wants to cancel the attempt before finding out whether it worked.  Not supported (from what I can tell).  I had to implement a wrapper to fake it.

Saturday, November 21, 2015

Network Control of the Pi (WebSockets)

I don't know what the specific architecture will be for control of the Pi over the network.

However, it does appear likely at the moment that:

  • Python will be involved
  • WebRTC will be involved (in some cases)
  • Browsers will be involved
This leads me to consider WebSockets, which is bi-directional message passing, supported by Browsers, and also now naively by Python and other languages.

Python is in scope due to it being the language of choice on the Pi, and is covered by a number of libraries which claim WebSocket support.

WebRTC is in scope due to the requirement for "Signalling," which is the discovery and transfer of media/network details.  This can easily be done over WebSockets, and is seemingly commonly done that way.

Browsers are in scope since any control systems put together would be much nicer with a point-and-click interface, and Browsers are perfect for this.

So, I have deiced to learn how to implement, in Python, some libraries which can act as the middleware between my Pi and the internet (probably a relay of some sort for WebRTC Signalling).

Also any process-to-process communication on the Pi can be done over WebSockets because why not.  Keep it all simple and hopefully make the testing easier as well.

Friday, November 20, 2015

Circuits

I'm not very experienced with Circuits or Electricity.

I've read about it in the past and tried various little experiments but I have no particular experience beyond that.

In the past my emphasis had been to learn about how electricity worked.  Here I'd like to simply apply basic circuits to build remote-controlled mechanisms.  So the focus has changed.

With the Pi I have to now care about:

  • Controlling circuits.
  • Not blowing up the Pi as a result of wiring up a circuit to it.


My initial attempt was to try to control an SG90 Servo from the Pi.


I wired it up directly to the GPIO pins and the power, and the servo moved around a bit and then the whole Raspberry Pi rebooted.

I wasn't sure why because there were videos online of people doing exactly that with no issue.

I thought perhaps the Pi was being affected by the electrical noise and feedback of the motor, so I built a protection circuit to isolate the Pi.  This did not work.

After more thinking and searching, I concluded that perhaps the motor was exceeding the total power output of the wall adapter I was using.

After looking, I found that the adapter I was using produced 5V at 750mA.  I replaced it with one providing 5V at 1100mA, and the problem of rebooting has not come back again.

I will keep the protection circuit in place just for good measure.


Thursday, November 19, 2015

Video on the Pi, and over the Network (with WebRTC)

It'd be nice to have the Pi able to:

  • Operate a camera (webcam)
  • Relay the video over the network
Thinking about this, I'd like to do as little work as possible on the video.  I don't know much about encoding/decoding, but I do know it's CPU intensive (something I don't have much of on the Pi).

Therefore I'd like to do minimal work but be able to kick a video stream out over the network.

It made me think of WebRTC, a web-standard peer-to-peer media transfer mechanism.  Used in several places include Google Hangouts.  I didn't know much about it so I researched it.


In short, a WebRTC endpoint (like a web browser) will want to establish a peer-to-peer connection with another endpoint.  This entails:
  • Discovering another endpoint (not part of the standard, you implement this)
  • Exchanging details about media capabilities, and network / NAT details (details acquired by API, but still up to you to implement the transfer.
  • Attempt direct-connection (API handles this, but you need to provide STUN server details)
  • Javascript (or other language) then is provided with a stream of media content (like video) which can be directed to the screen (like a <video> tag 'src' attribute in a browser).

This seems promising on the Pi side if there is a non-browser implementation.  And there is.

Hunting around there appears to be several mentions of WebRTC and Python and Pi, including OpenWebRTC, and others.

However, the most successful path I could find online appeared to be message boards discussing the UV4L (Userspace Video 4 Linux) implementation of WebRTC and interface via a WebServer.


Another post will include detail on attempts to set up and use.


Resources about WebRTC:
  • WebRTC Demo (link)
  • WebRTC Tutorial - Infrastructure (link)
  • WebRTC Basics (link)

Resources about UV4L:
  • UV4L Announcement about supporting WebRTC (link)
  • UV4L Instructions on use (link)

Wednesday, November 18, 2015

Raspberry Pi 2 Setup Notes

Took a micro SD, not a regular SD.  Had to buy a few of those.

The raspbian OS install wasn't so bad.

Keyboard is in UK setup, which took a googling to figure out how to change.  Various utilities don't seem to be there, such as telnet.

I bought the wifi dongle to go with it (since my intention is to try to operate it over the network, and subsequently the internet).

Setting up the wifi wasn't too bad but involved setting up a config file with my network and password.  Despite the dongle being 2.4GHz and 5GHz capable, my 5GHz network wasn't detected.

Setup details can be found (here).


Sunday, November 15, 2015

Prototyping Platform

For controlling electronic devices, I've decided to try to use a Raspberry Pi.

I had tried an Arduino in the past and found it was a bit annoying to deal with having to re-program regularly with their flashing device and the serial/usb monitor, etc.

Raspberry Pi I believe is a much more powerful device that you can run Python (interpreted, no compile, lots of modules), and even a monitor on it.

Overall, I am not looking to challenge myself regarding the platform, I want to learn the electronics.

In the end I have purchased a Raspberry Pi 2, which is a quad-core Arm 7 processor with 1G RAM.

If I later think it's overkill, I can get other control systems.


Saturday, November 14, 2015

Getting Started

I read about some of the Google and Amazon package delivery drones a few weeks ago and I've been interested in learning more about what drones are and why they're in the news so much.

I spent a weekend reading up about hobby fliers, what they fly, and what technology they use to it.

Seems that the hobby breaks down in a few dimensions such as:

  • Fixed-wing versus quad copter.
  • FPV or not.
  • Long distance or not.

Some of the technology behind these systems is very impressive.

High-end radio control systems can operate these craft 100km away.  The video systems can transmit real-time video back to the operator to control at those distances.  Notably the video the operator sees in real-time isn't what gets published online, that's a HD camera strapped to the nose, what they see is fairly grainy.

Quad copters and even fixed-wing seem to have a number of sensors which assist with balance and control in-range, as well as auto-pilot systems and fail-safes which return the craft home if it goes out of range.


I think controlling these devices at long-range is interesting.  Some of the articles I read about Google and Amazon indicate that control over the internet may be the way those systems operate.

Control over the internet at long-distance seems plausible provided they're staying at an altitude which still receives service, which the 500ft ceiling seems likely to.

I'd like to play around with some of the technology at use here so this blog was created to keep notes and mark progress.

My aim is to learn to control various related electronics, locally and remotely over the internet.  Hopefully in learning these devices I will increase my familiarity with circuits and control systems, and interesting or useful ideas will come to mind about how to apply them.

This blog was created Nov 28, 2015, when I had actually started reading around Nov 14, 2015.